8/31 on Salsa

Ok ok ok! I’ve received so many questions since posting about canning salsa that I decided to put it here for easy reference! As many of you know, I do not follow recipes most of the time. I’ll never be your gal for recipes, but what I can try to do is show you my methods, and hopefully that will empower you to go for it! I personally find recipes to be limiting.

For example: say I’m growing tomatoes in my garden and decide I want to can salsa. I also have a few jalapeños and maybe an onion or two. I go to the internet to find a recipe. Well, the recipe calls for 10 lbs. of tomatoes, 2 lbs. of onions and so on. Do I go buy what I need to make up the difference? Well no – at least I don’t. I have a good enough idea of how things are put together to know there’s a little give and take.

Last fall, my husband graciously helped my sick, pregnant self to plant some garlic, which we were able to harvest this summer. The week before I gave birth, we also managed to plant a few tomato plants, jalapeños, onions and a few other things. Fast forward to harvest time and, as we all know, not ALL the tomatoes are ready at the same time – same with the peppers. So every few days I harvest what’s ready, but what’s ready might not be what the recipe calls for.

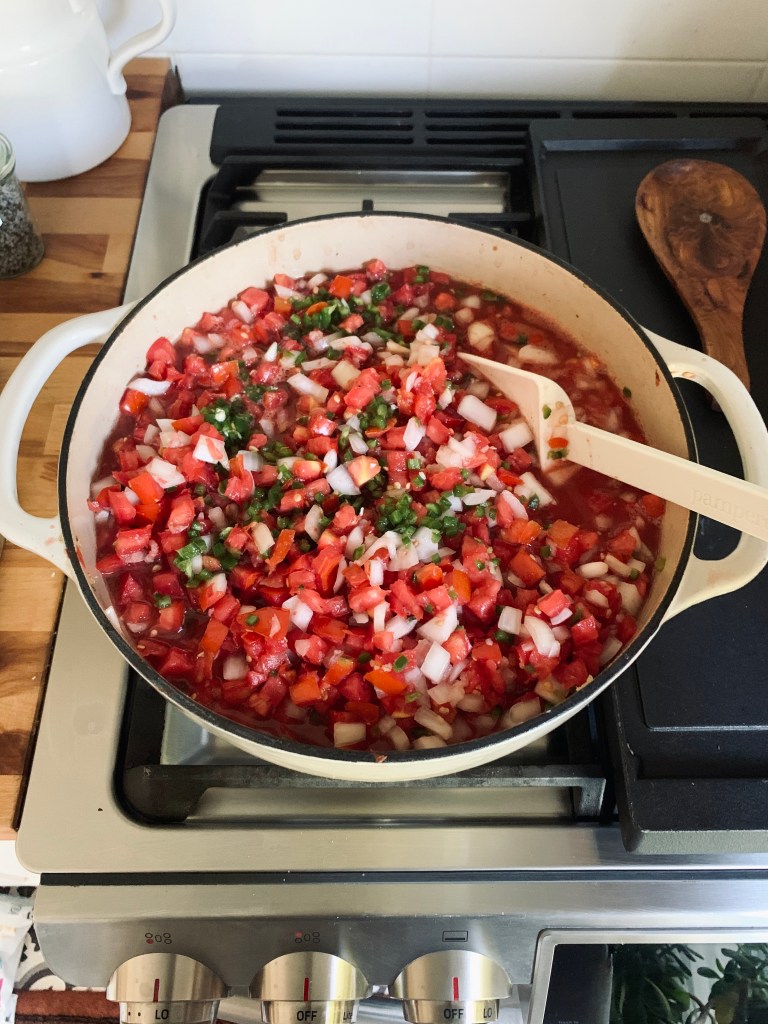
When I’m ready to make salsa, I may end up with a basket of tomatoes on hand, 3 jalapeños and some cured garlic and onions ready inside. I chop up all my tomatoes and throw them in a pot. Then I chop my jalapeños and a few onions, add some garlic, salt, pepper and fresh lime juice. At this point, I get out my bag of tortilla chips and let everyone taste, adjusting the flavor as needed: add more jalapeños if it’s not spicy enough, a little more salt of it is generally lacking in flavor (but just add a little at a time). Salt will bring out all the other flavors and make them POP.

Do you see where I’m going with this? It’s rather simple when you can figure out how to use what you have, even if that means you only have 1 tomato and you want to make salsa for dinner – you can totally do that! There’s no right ratio and iMO, salsa is very forgiving. It can be heavy on tomato or heavy on onion and still be really good. I don’t think you can use too much garlic and spice level is a personal preference Lime juice is the real ticket and I don’t think you can have too much of that either!

When it comes to canning, there are probably thousands of tutorials, recipes, YouTube videos, etc. and I’m by no means an expert, even having done this literally my whole life. My method for canning salsa is simple. I dice up all my ingredients in a pot, adjusts the flavors as needed, then cook on low, simmering until it’s the thickness I like. This could take a long time depending on how watery the tomatoes are. I prefer a thick salsa, so I cook mine down for a long time.

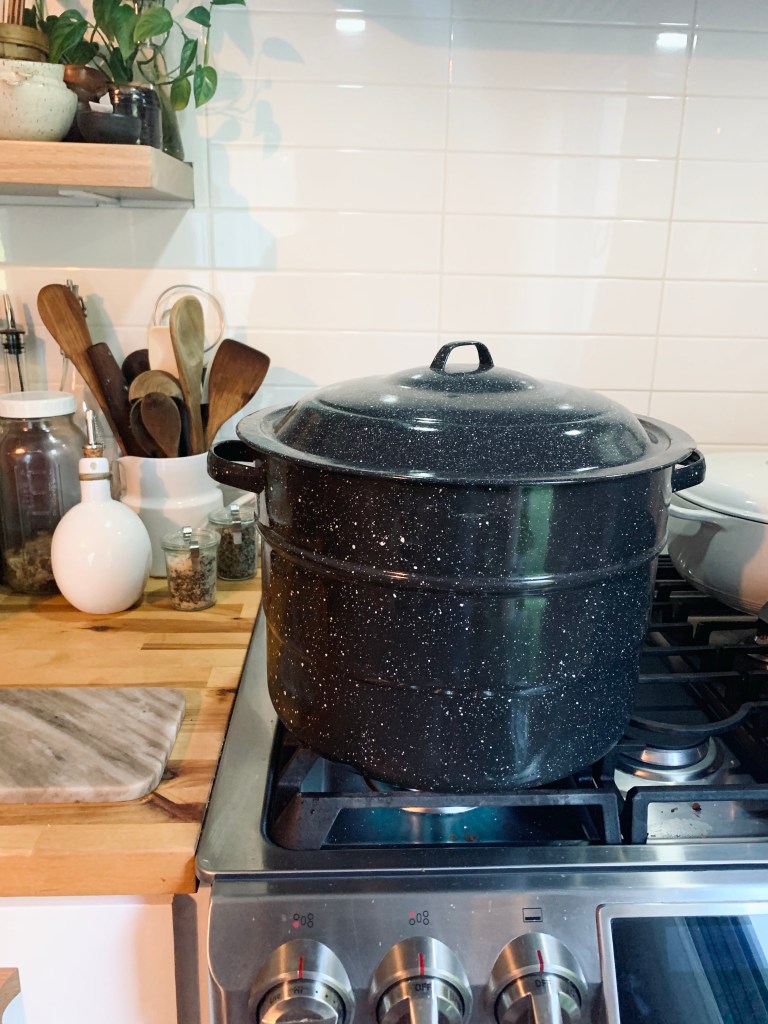
When it’s thick enough, I use an immersion blender to get it to the consistency I want. I keep it the salsa hot on the stove while preparing the jars. For this next step, you’ll need a water bath canner. I’ve always found mine second-hand, but whatever you do, you need a pot big enough that water will cover the tops of the jars. There also needs to be a buffer of some kind between the jars and the bottom of the pot or you risk breaking the jars (trust me, I’ve been there). It’s possible to do this without a canner, but easier to just purchase one or ask around and see if someone has one you can borrow.

I’ll bring a pot of water to a boil and then put the empty jars in the water for a few minutes to completely sterilize them. Once they’re hot and sterile, I remove the jars form the water and use a canning funnel (or a small measuring cup) to fill the jars with salsa. It’s important to try to keep the rims as clean as possible. When filling the jars, leave a good inch of head space. Once full, wipe the rim of each jar with a paper towel or hot damp rag to make sure it is clean. This step is super important to get a good seal. There can’t be anything on them!

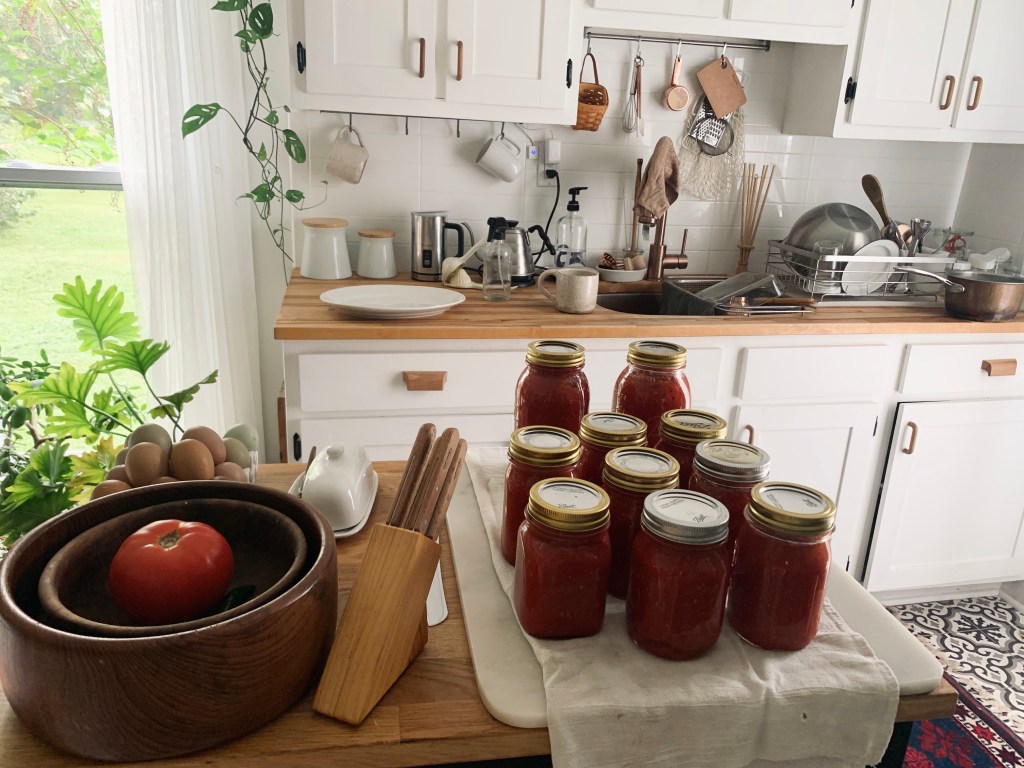
Next, using a pair of tongs, submerge the lids for a few seconds in the boiling water, then place them on the jar (they don’t have to be dry). Screw on the lid rings and carefully lower the jars into the boiling water. I boil mine for 15 minutes, then turn off the heat and let sit for 5 minutes before carefully taking them out and setting on a towel. Let the jars rest overnight, being careful to not push on or touch the top of the lid. Once they’ve set out overnight, test the seal by pushing on the top of the lid. If it sinks down and pops back up, that means it didn’t seal. Put these in your fridge and use it first. If the seal is good, the lid won’t move. For the jars with a good seal, remove the rings and store in your pantry.

There are many canning safety guidelines, and not all things can be canned equally, so I encourage you to do your research when setting out with something new. BUT don’t let that stop you! I’ve canned my whole life – and mostly only loosely followed guidelines – and never had an issue. Once you have the proper equipment and get the hang of it, it’s super easy and very rewarding.

8/17 Cloth Diapers

13 years ago, I was pregnant with my first son and wanted to use cloth diapers. People thought I was crazy! I found solace in an online community of “hippy” mamas who, like me, used cloth diapers, made baby clothes and did all things crunchy. While I found myself lonely in my day to day, I managed to build a community online that felt like home. It’s where all this started, really – where I learned about blogs and platforms for saving inspiration (ahem, Tumblr). Crazy to think that my internet journey started with an unpopular (at the time) desire to use cloth diapers on my babies.

As you can image, with quite a few years under my belt, I was able to narrow down exactly what worked for me and what didn’t. I really gravitated towards a simple, minimalist, cloth diaper stash. And all these years later, it is still what I love.

There are endless brands of diapers to try, but I always encourage friends to try a few before building a stash. The best diaper can vary a lot, baby to baby, depending on size and body composition. There are lots of options for obtaining used diapers to try before making a big investment. Everywhere from eBay, poshmark, Craigslist or your local kids sale. It might seem weird or gross, but it’s not hard to find diapers second-hand that have either not been used or were used so lightly that there’s no sign of wear. I started gathering parts of my stash as soon as I got the + sign, and by the time Zion got here, we were all set!

Before I dive into what I use, there are some things to consider before deciding to go with cloth. First, and I think most importantly, is your washer situation. We were in need of a washer so we (I mean, Zak) did a lot of research into best washers for cloth diapers. Basically, it comes down to a few things: Front loaders aren’t an option here – you’ll need a good agitator with a “deep fill” option. We were lucky to find a steeply discounted Speed Queen washer at a local scratch and dent retailer. With a 5-year warranty and a 20-year life expectancy, we feel confident we made a good choice for the duration of our parenting career. Now, the numbers of diapers I’m about to share is based on doing a load of diapers every other day. You certainly don’t have to do them that frequently, but I, for one, don’t appreciate diapers sitting longer than that – but the choice is yours. Less washing necessitates a bigger diaper stash…

To wash diapers, I run my washer on a pre-soak and extra rinse cycle, with water temperature set to hot. I only use unscented, free and clear soaps (the more natural, the better to avoid build up) and absolutely NO fabric softeners! By using scented soaps and/or fabric softener, you could run into a build up issue. You’ll know if this happens if, when baby soils a diaper, it smells like ammonia. If this happens, STOP with cloth until you get it sorted out. There are plenty of online tutorials on this: it’s called “stripping your diapers.” However, this shouldn’t ever be an issue if your washing routine is good. For drying diapers, I recommend sunning them whenever possible. Not only is this better for longevity of the diaper (and the planet), but the sun does an incredible job of bleaching out stains, which you’ll definitely want to do, because drying in a dryer will set your stains and make it harder (if not impossible) to get out. I love having a squeaky clean diaper without any stains. You should be able to bury your face into a clean load of diapers and not smell anything or see any stains.

To store dirty diapers until I have a full load to wash, I keep a 5 gallon bucket lined with a BumGenius pail liner that I bought second-hand. Our bathroom is small, so we keep the bucket in our bathtub. Another wise investment I recommend – once you’re really committed to the cloth diaper lifestyle – is a diaper sprayer. Again, I found a bumGenius brand new on eBay for a really great deal, and let me tell you – it is a lifesaver! I can’t imagine using cloth diapers without one.

Now on wet wipes. I have tried both cloth and disposable, but after three rounds of doing this, I strongly believe that if you are going to use cloth diapers, it is worth fully committing and using cloth wipes as well. Using disposable wet wipes, you will have to keep them separate and throw them away after changing a diaper. With cloth wipes, you can wrap them up with your cloth diaper and toss it all into your pail – pretty easy. I use a simple, homemade wipe solution in a spray bottle to dampen wipes as needed. You can also soak your wipes in a solution ahead of time, then store in a container for use. I’ve tried both ways, but wetting the cloth at time of use has worked best for me.

My wipe solution is simply a few squirts of Dr. Bronners castile soap and water in a spray bottle. A lot of recipes you’ll find online will call for oil of some kind and essential oils. A little scent might be nice, but I personally don’t use essential oils – especially on babies. If you enjoy a nice scent, I would recommend getting a scented soap over putting EO on your babies skin. As for using oil, I think it’s fine to do this as long as the solution doesn’t sit too long before being used as the solution could easily develop mold. For the wipe itself, there are so many cheap options: you can buy them (like these) or you can even cut up old receiving blankets, flannel sheets etc. Any soft, absorbent fabric will do. Simply cut up the fabric and serge the edges.

Another thing to consider is diaper cream. Cloth diapers make it a little more challenging to know when baby needs a change because the diapers don’t swell up like a disposable. You’ll have to find a rhythm that works for you, but as a rule of thumb, I usually change before and after each nap and this has kept us from ever needing any diaper cream. However, there are plenty of cloth-safe diaper creams on the market that you can purchase. I make my own diaper cream, and you can find tutorials online or buy a cream that doesn’t have zinc. My personal preference should baby get a rash, is to let baby go naked as much as possible until it clears up. I’ll strip him down and just let him play on a towel or put a prefold cloth diaper on, without a cover, so I can see exactly when he’s wet and change to keep the bottom dry until the rash is clear. The only exception to this is a yeast rash, also known as thrush. This is identified by a rash that looks like tiny, raised red dots. If this happens and you confirm it’s thrush, you should stop with the cloth diapers until it’s clear and make sure to thoroughly strip all your diapers! Trust me – I’ve been there and it’s not fun, especially if said thrush spreads to mama’s nipples… but that’s another story!

Okay, on to the good stuff: diapers! I’m a mix of old school and modern here. I’ve found the old school prefolds with a snappi and nylon pants are a winning combo. It’s simple, easy to use, easy to clean, and the cheapest you’ll find. The modern alternative is bumGenius all-in-one (AIO) diapers. I love these for when we’re on the go, for grandparents, babysitters, siblings, or dads who struggle with the old school prefolds. The AIO diapers, while more expensive, function like a disposable diaper and make it super easy to change baby. They’re also a good solution for overnight, as certain styles come in wicking fabrics that helps keep moisture away from baby’s skin. You can also get soakers for overnight to add to prefolds if you go the old school route. You can see in my diaper drawer, I still have a stash of disposable diapers on hand for night times. My sleep deprived self hasn’t been ready to tackle cloth at night. I currently have 12 prefolds, a pack of snappis, about 10 AIO bumGenius diapers, 4 nylon pants and 2 dozen wet wipes.

One last thing to consider is an on-the-go wet bag. I’ve always made these myself and you can find many tutorials online if you’re inclined. This is what you keep in your diaper bag when out and about to store soiled diapers until you make it back home.

Q&A? if you have any specific questions or comments drop them bellow and I’ll do my best to answer so others can see as well.

Good luck with the fluffy butts!

8 / 12


“I learned to find equal meaning in the repeated rituals of domestic life. Setting the table. Lighting the candles. Building the fire. Cooking. All those soufflés… Clean sheets, stacks of clean towels, hurricane lamps for storms, enough water and food to see us through whatever geological event came out way. These fragments I have shored against my ruins, were the words that came to mind then. These fragments mattered to me. I believed in them…I could find meaning in the intensely personal nature of life.”

– Joan Didion


1/ Squirreling away summer

2/ Teething baby

3/ Home school or school at home? First day

4/ More summer bits

5/ Weekly


What if all I want is a ‘mediocre’ life?

5/4 Zions birth

[*Zak here. Bek asked me to read over her post before publishing. I couldn’t help but add my own memories to this story. In order to keep the integrity of Bek’s original post, I have marked my additions in a similar format as this note.]


41 weeks 2 days. We thought that he would have been here by now [*I did, at least – Bek continually tapered my expectations by telling me she would be late], but on par for the year 2020, nothing was going as planned. We went to our midwife for a routine stress test and ultrasound in the morning, just to make sure everyone was still healthy. I was feeling pretty miserable, but hesitant to try any self induction methods. My midwife recommended a recipe for “caster eggs. I was very skeptical, but picked up the castor oil on our way home.

Around 11:30am, I was choking down two scrambled eggs and a piece of toast – all smothered in castor oil. Imagine a delicious brunch meal, but covered in a thick, tasteless oil – a similar consistency to motor oil (insert gagging noises). It was a warm, sunny day, so the boys and I went outside and to lounge in the hammock. Almost immediately, I started noticing cramping in my low abdomen. No contractions at this point, but I became increasingly uncomfortable. Being exhausted from not sleeping the night before, I migrated back inside to lie in bed. Collin joined me and we both fell asleep.

Around noon, I started feeling more regular contractions. By 1:00pm, contractions were strong and regular enough that I started tracking them on an app. At first, I was able to fall back asleep between contractions, but things progressed to the point where I was unable to sleep. I remember feeling confused – perhaps it was just bad stomach cramps in reaction to the oil and they’ll go away. Meanwhile, Zak was in the next room over on a video call for work, completely ignorant to how quickly things were unfolding. [*completely accurate – I had no clue what was happening]

Once the app started alerting me that it was time to go to the hospital, I text Zak. [*Counter to what one would expect to receive from a laboring wife, this text had zero sense of urgency. I believe it was something along the lines of ‘Can you come here when you have a moment?’] At this point, I was in tears from the intensity of the contractions. I called my midwife and received the go-ahead to transition to the birthing center. Zak quickly gathered our things and I made arrangements for the older boys, as they would not be allowed to be at the birth due to COVID-19 safety precautions. The ride to the birth center was miserable, as I continued with near back-to-back contractions.

We arrived at the birth center around 2pm, at which point the midwife checked me around 4 cm dilated. The midwife ran a bath and, at our request, left the room to allow Zak and I to labor on our own. [*With a London Grammar station playing softly in the background,] I made home in the tub to continue laboring. Contractions were INTENSE from the beginning and never stopped. The tub helped, but I struggled to get comfortable. At one point, I got out of the tub to lay in bed while Zak gave counter pressure on my back. Still not comfortable, I made my way back to the tub. [*Repeat this cycle 4-5 more times, but who’s counting?] About every half hour or so, the midwife would come in the test vitals and make sure we were doing okay. [*Our midwives were amazing! Being my first birth experience, I loved the balance of privacy and coaching they provided. It was a very special and safe experience being able to labor on our own, but always know the midwife was on the other side of the door should we need any assistance. Thank you, TOL!]

Hours later, I was feeling extremely fatigued. I moved to the bed once again, what would end up being the last time. I remember wanting so badly to just lie down and sleep. Luckily, transition finally came and the contractions spaced out to where I was able to have brief moments of rest. Sitting on the edge of the bed, I would lift myself off the bed during contractions, letting my legs and torso dangle, then collapse back onto the bed and fall asleep until the next one came. [*This was the most intense part of labor to witness. Up until this point, we could hold intermittent conversation and my honest (though often poorly executed) efforts to help were kindly received. But once Bek hit this stage, she flew solo. The midwives and I were simply an audience at this point, captivated by the beautiful miracle unfolding before us.] During this time, I was quiet until I got the urge to push, at which time I would vocalize my pain. After several cycles of this,  my midwife encouraged me to lie down to create room for baby to come. I pushed for just under an hour – the most intense hour of my life, I might add. [*Never have I felt so scared, yet so powerless. I think I may have (re)found God in this exact moment.] I had hoped that with each of my births, labor would become progressively easier – but my body had a different plan. I can honestly say this was the hardest and most intense birth experience I have experienced. [*Before getting pregnant, Bek would tell me how much she loved pregnancy and everything it encompassed. I remember thinking, almost daily, ‘WHY!? You seem miserable!’ It is helpful to put this birth in perspective with her prior births, to know that Bek isn’t (too) crazy, and that it was just a very difficult birth. But even more, being on the other side, I now understand how one’s mind so easily overlooks the hardships of the process and focuses solely on the overwhelming joy and beauty of the outcome.] 

Our perfect little bear was born at 8:41pm. I pulled him straight to my chest and we cried our happy tears. [*I am an intensely emotional person, yet often struggle to find comfort in the expression of said emotions. I was highly curious as to how I would respond to the birth of my first child. That night, I learned that my default emotional response to extreme joy is uncontrollable sobbing. Lovely.] He nursed and Zak cut his cord. All vitals were great. Weighing in at 11lbs 10oz [*we had to weigh him twice because the midwives didn’t believe the first reading], we welcomed our big boy Zion Woolery Appel, named in honor of Zak’s late grandfather, Woolery Haynes. Less than 12 hours after arriving at the birth center, once we all had adequate food and rest, we packed up and headed home – the beginning of a beautiful new chapter in our life.

4 years later

Where have I been, you ask?

Or, better yet –  where haven’t I been?

Since my last posting here, I’ve quit my full-time job. Traveled to Bali for yoga teacher training. Moved a few more times. Traveled to Budapest. Rekindled a love for parrots in Croatia. Accidentally drove through Bosnia. Adopted a parrot on my return home. Bought and renovated a small farmhouse. Got 7 tattoos. Gave 15. Opened a yoga studio and closed it a year later (wasn’t for me). Ran an Airbnb. Met the best human I know and got married (and stuck) in Iceland (damn you, WOW Air!). Threw the pizza party of my life to celebrate. Got pregnant (on purpose) and had a baby boy (Zion). Dove deeper into yoga, pottery, herbalism and foraging. Sold lots of said pottery (mostly boob mugs). Switched the boys school. Spent most of my time in carpool line, apologizing for losing my patience. Gave a million kisses and I love you‘s. Countless nighttime readings and skate park sessions. Overheard too many games of my boys playing Minecraft on Xbox and some random (not my) boys playing Minecraft on YouTube.

Went through intense trauma therapy. Healed many wounds and found peace with the others. Learned how to say ‘No’ and set boundaries. Learned to love, and better yet, how to let others love me back. A couple bad apples (a couple good ones too).

5/20


On Home 5/19

I write in the pictures I take 

The memories of a home 

A season lived well

Full

Coffee in hand 

Black 

New vinyl spinning 

Black and sweet 

The heart aches for a space unknown 

A place to call home 

Here or there 

What answer abides

Fullness in life not synonymous with the constant I crave 

Or do I 

Would boredom not ensue were life a consistent brew 

Life oh life if I go out and catch your wave won’t you bring me back

Back to a home only a distance away from before 

4/4


1/ that smile 

2/ morning cup 

3/ celebrating the best of friends with a seafood piaya

4/ the joy of unexpected guests to cook for 

5/ the smell of spring air 
*thank you deeply for all the kind replies on last weeks post. 

3/29

  
Reflecting this week on the changes I’ve made in my life and the ones I’m still aiming to achieve. 

My decision to pull away from most forms of social media was by far the best thing. I don’t regret it for a second and while most people assume I’ll come back to those places I don’t see it happening. I feel so much better and free without them. 

So my question to myself this week was why I came back here. I honestly don’t fully know. Having a place to put my art is part of it. I found all these images building up that represent the beauty of life and had nowhere and nothing to do with them. I also think there’s something still left unsaid. Thoughts to be shared and books to recommend. I’ve seen so much of the impact passing along even little bits of wisdom can have on the quality of life as well as being the recipient of such thoughtfulness. There’s an element of that I don’t want to take away from the people who still come here for inspiration. I want to share what I’ve learned. 

For now, I hope whoever reads these words visually or audibly there’s solace and encouragement found. 

Till then. 

3/21


 Suffering – 

pain, humiliation, sickness and failure – 

is but a kiss of Jesus.
Once I met a lady who had a terrible cancer,

She was suffering so much.

I told her,

     “Now you come so close to Jesus on the cross

       that he is kissing you.”

Then she joined hands and said,

     “Mother Teresa,

      please tell Jesus to stop kissing me.”

It was so beautiful.

She understood.
Suffering is a gift of God

a gift that makes us most Christlike.

People must not accept suffering as a punishment.
Anyone who imitates Jesus to the full

must also share in his passion.
We must have the courage

to pray to have the courage to accept.

Because we do not pray enough, we see only the

      human part.

We don’t see the divine.

And we resent it.
I think that much of the misunderstanding of suffering

      today

      comes from that

      from resentment and bitterness.

Bitterness is an infectious disease

      a cancer

      an anger hidden inside.
Suffering is meant to purify

      to sanctify

      to make us Christlike.
                                                                      – Mother Teresa